
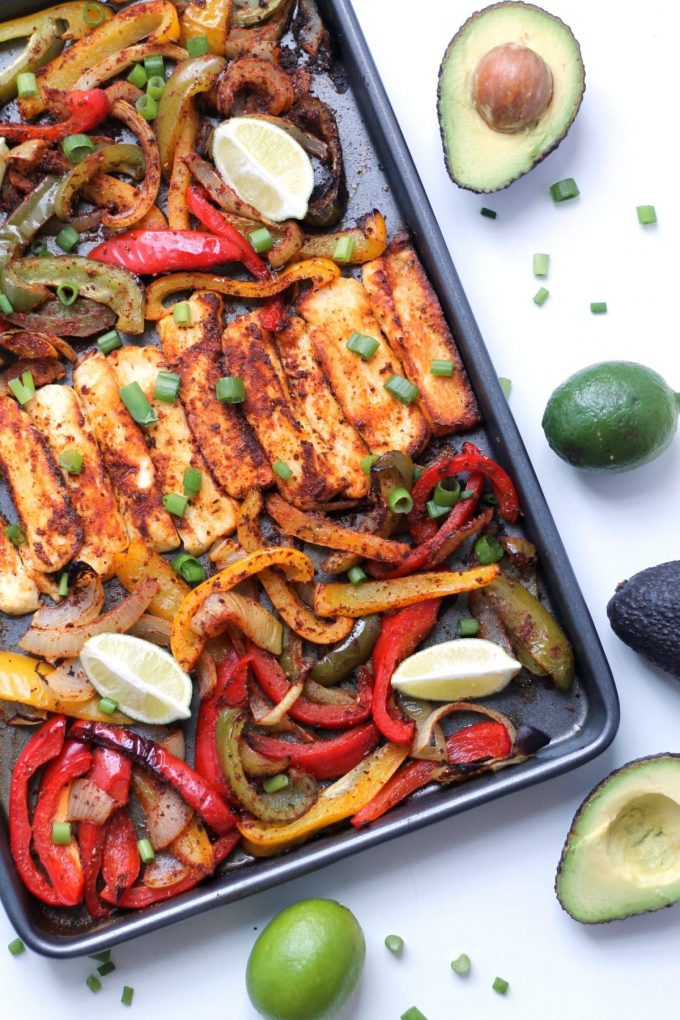
Thanks to its robust, grill-able texture, halloumi cheese is so much fun to cook with and makes the best vegetarian fajita filling! In this recipe, halloumi is seasoned and roasted in the oven with veggies to make easy vegetarian sheet pan fajitas. No one will miss the meat… halloumi fajitas will be your new favorite!
Introducing my favorite (dare I say life changing) vegetarian fajita recipe
As a vegetarian who lives in the UK, I eat a lot of halloumi. I am old enough to remember when it was the cool new thing, but now it’s become a staple pub food ingredient here, showing up in burgers, breakfasts and fish and chip shops. Since halloumi came around, vegetarian menu choices have been 10000% less dull, and meat eaters are usually happy with it too. It’s special like that!
What I am trying to say is, halloumi is a tried and tested crowd pleaser and you should make these fajitas for… well, just about anyone.
Fajitas are one of those dishes where sometimes vegetarians simply get everything but the meat. No alternative protein, just a blank space, which feels sad. That is why halloumi is perfect for this job. It’s a meaty protein which makes the vegetarian option super appealing.

Halloumi Fajitas made easy!
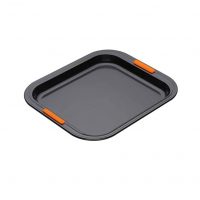
My goal here was also to create a really easy recipe for you, so these fajitas are cooked on a baking tray in the oven. Typically fajitas are prepared on a sizzling hot grill, and you could certainly do this at home with a griddle or cast iron pan, but there is a learning curve with these types of pans and it requires a certain amount of attention. The sheet pan fajita method, while certainly inauthentic, makes things a little more straightforward and foolproof.
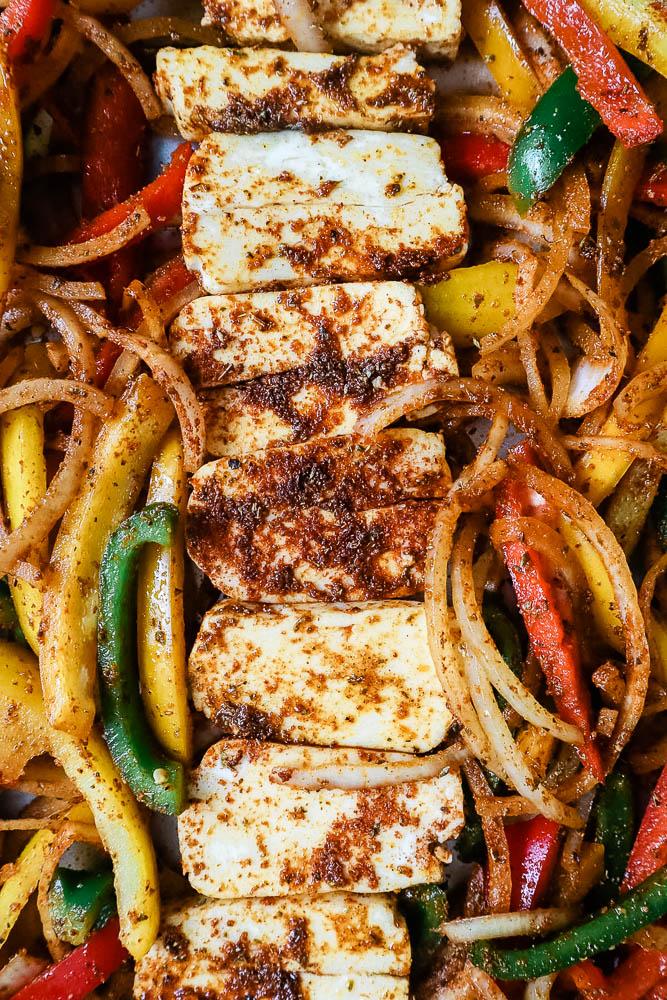
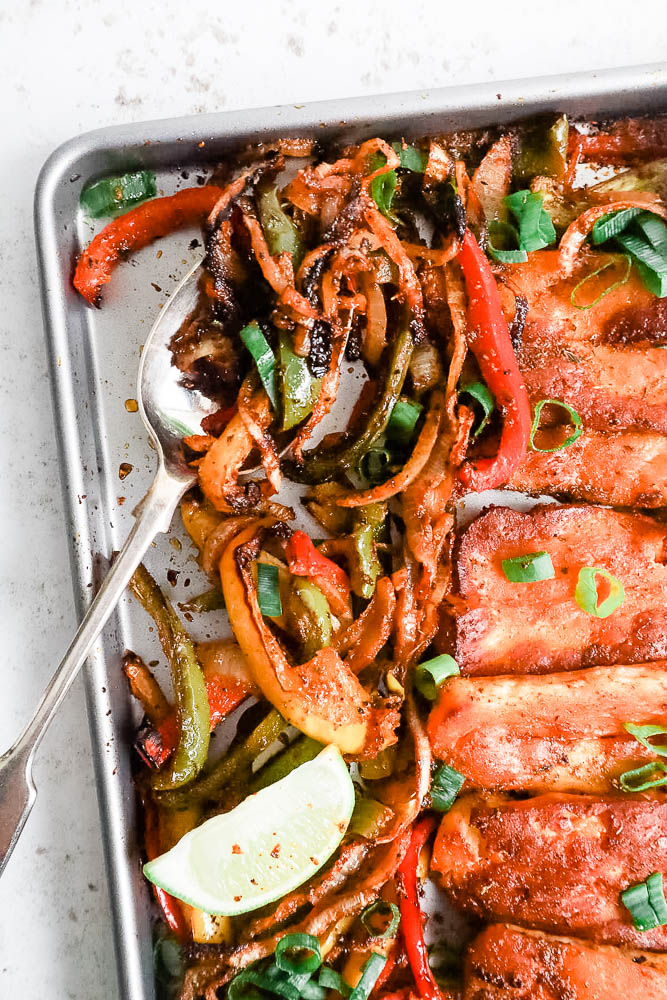
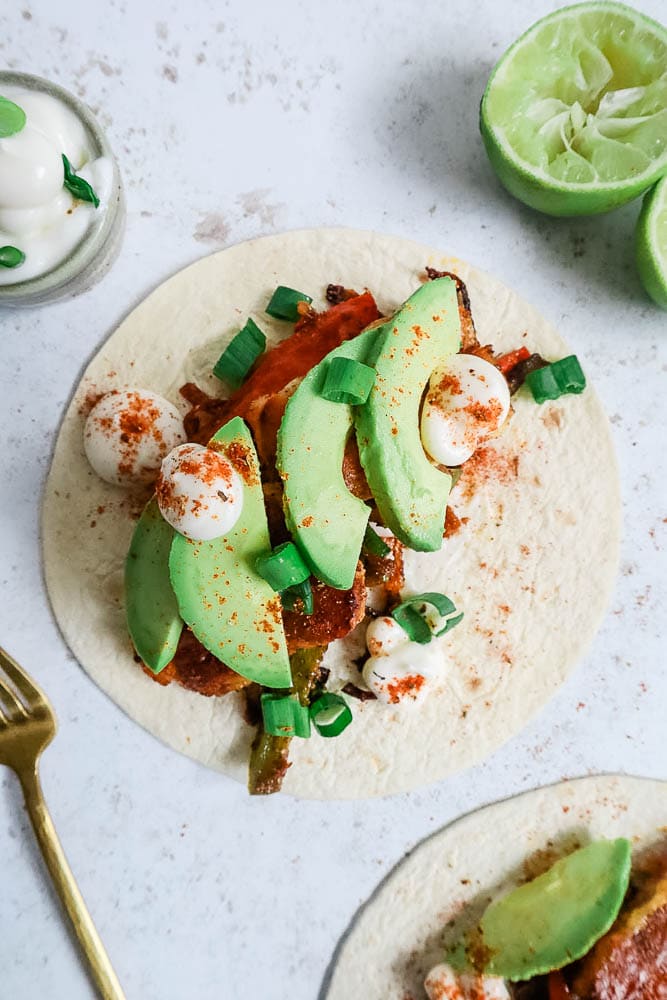
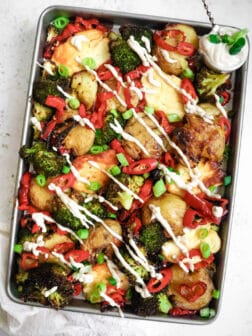
It’s just as simple as putting all your toppings on a sheet pan (large baking tray) and roasting in the oven for 20-25 minutes.
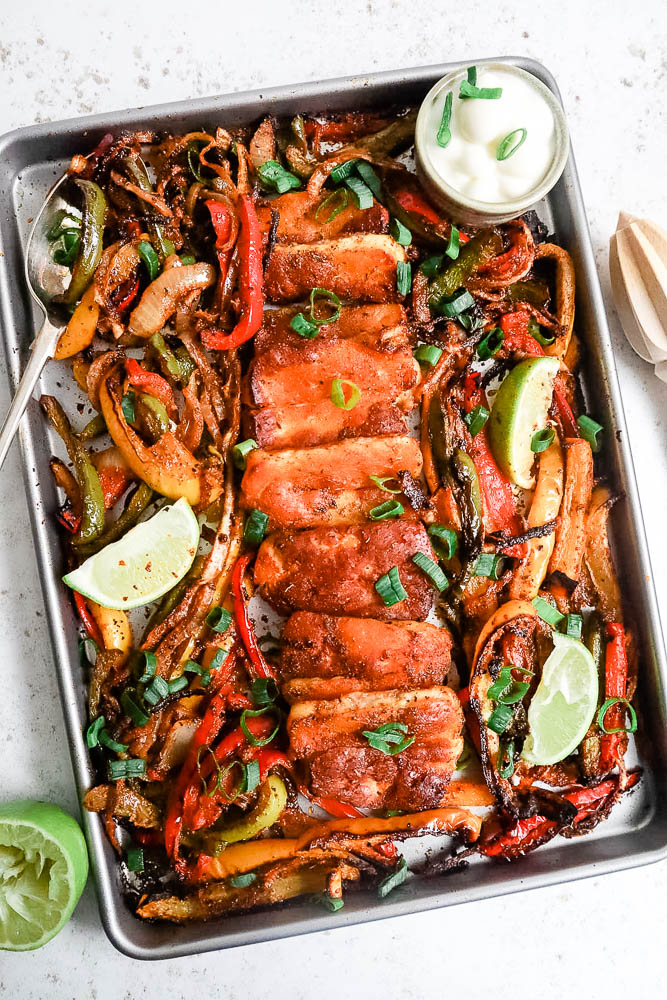
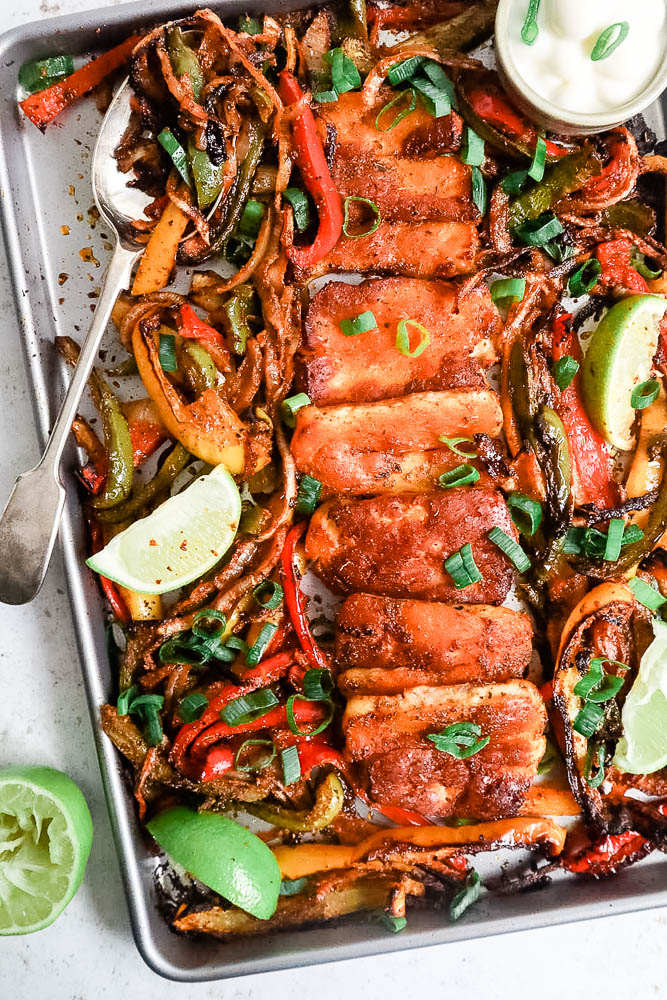
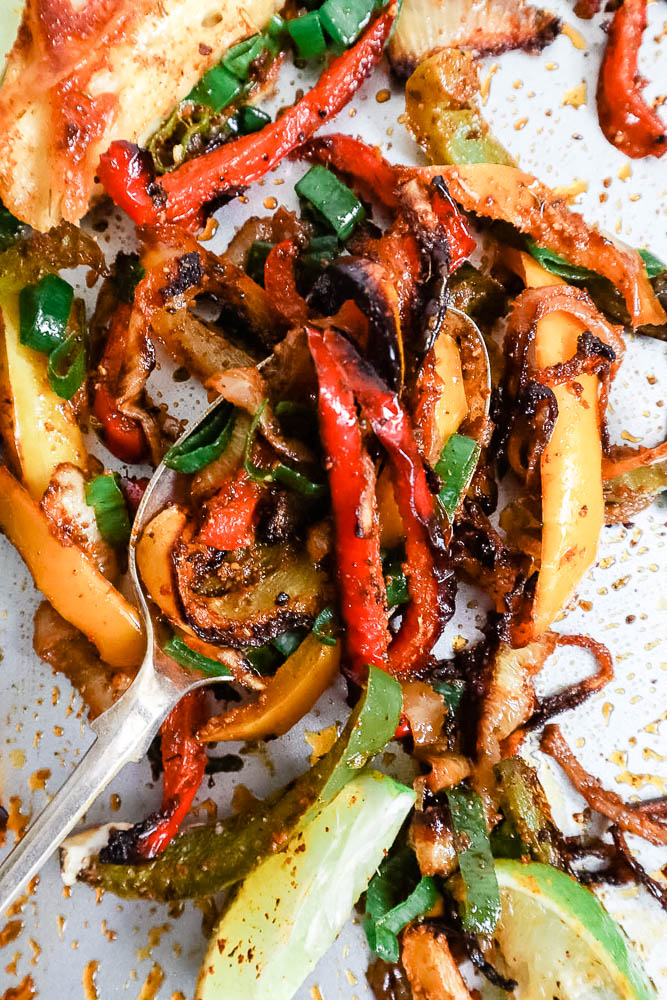
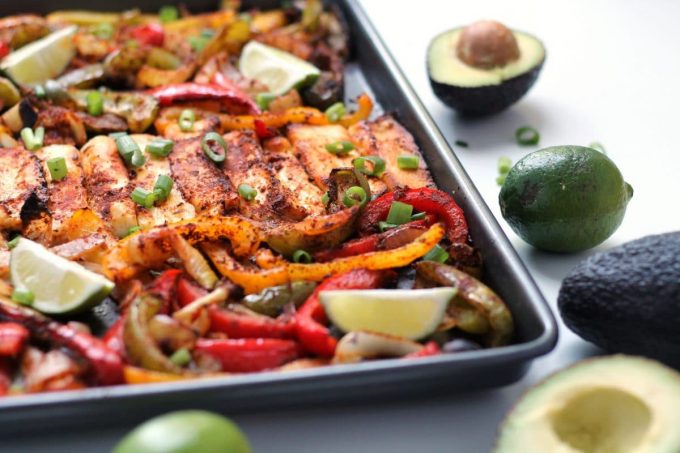
This is my favorite way to make homemade fajitas because you get some nice charred crispy bits that you wouldn’t get with a wok or frying pan. And so hands off! While everything is roasting, you have plenty of time to set the table, bring out some toppings and warm your tortillas. All in all, a low stress, low effort weeknight meal that everyone’s going to love.
Top Tips & Ingredient Notes
- Spice mix: I’ve included my own spice mix recipe, but feel free to swap in a packet of your favorite fajita seasoning, in which case you’re looking at an even quicker and easier dinner.
- You can make this spicier by increasing the chili powder or using a hotter blend.
- If you can’t find any halloumi, try paneer! It has a great bite. Paneer is less salty so the result isn’t quite as rich, but still great.
- If you are new to using halloumi, check out my guide to cooking with halloumi which includes an FAQ / troubleshooting section.
- Vegan? Try a tofu based vegan halloumi.
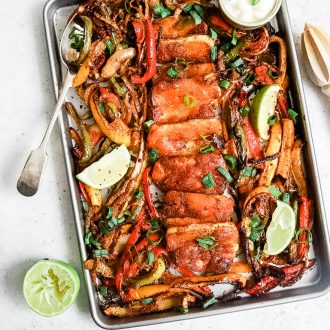
- Your cook time can vary: You want to bake for 20-25 minutes, until they’re cooked to your liking. Keep a close eye on things because all ovens are a little different! The current images show them cooked for the full amount of time, for a super crispy result. Less time keeps the peppers a little more crunchy and the halloumi a little more soft. Some readers have tried a hybrid – putting the onions and peppers in for a longer time, up to 30 minutes, but adding the halloumi later. This makes sense if you want super caramelized vegetables without over-doing the halloumi.
Suggested Variations:
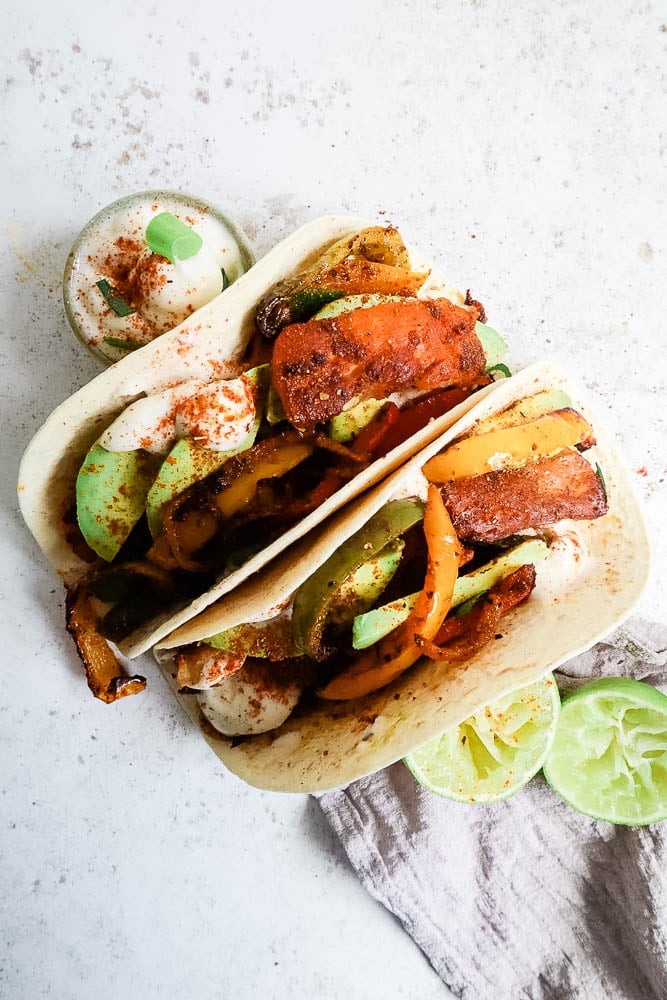
Love this fajita filling? Try changing it up and putting it in a different format…
- Fajita Bowls: For a gluten free version, you can make this fajita filling into a “bowl” meal instead. Add rice, refried beans, and whatever toppings you like.
- Fajita Salad: Prepare a big bowl of lettuce, add some corn, avocado, beans, diced tomatoes and onion, and top with your halloumi fajita filling!
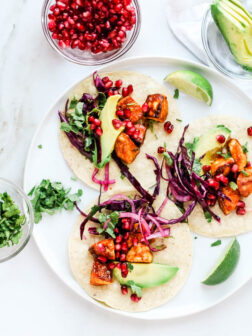
- Fajita Tacos: Use corn tortillas and add some slaw or lettuce to the top for a more taco-style meal.
More Easy Halloumi Dinner Recipes
Are you a fan of the squeaky cheese? ME TOO. I have a lot of halloumi recipes plus an extensive guide on how to cook halloumi for newbies. Here is a sampling of other dinners you may enjoy…

Roasted Halloumi Fajitas
Ingredients
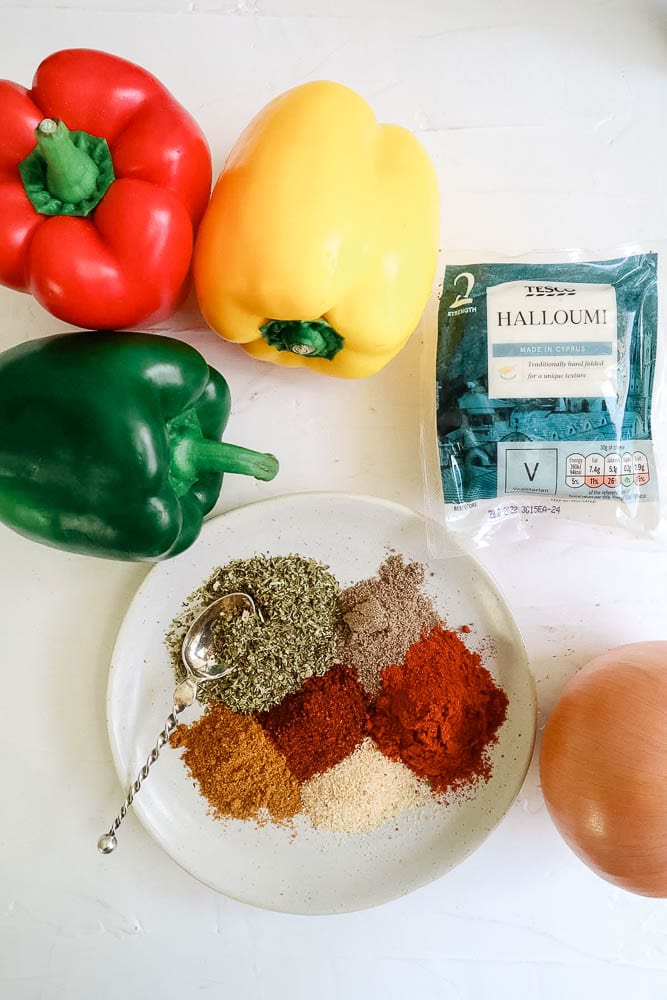
- 250 g (9 oz) halloumi cheese, sliced into strips
- 3 bell peppers, sliced into strips
- 1 large white onion, sliced into strips
- 3 Tbsp olive oil, divided
Fajita Seasoning
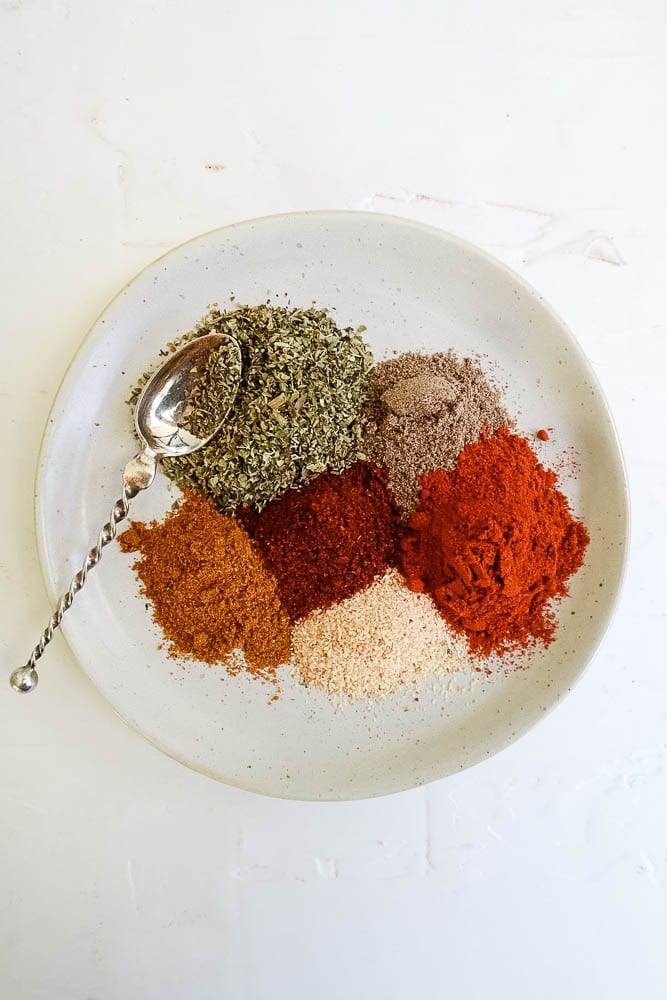
- 2 tsp oregano
- 2 tsp smoked paprika
- 1 tsp chili powder
- 1 tsp ground coriander
- 1 tsp of cumin
- 1 tsp garlic granules
To serve
- 8 flour tortillas
- Toppings of your choice: avocado, sour cream / yogurt, salsa
Instructions
- Pre-heat the oven to 410F / 210C (190C fan) while you slice the halloumi, onion and peppers.
- Prepare the fajita seasoning by mixing everything together in a small bowl.
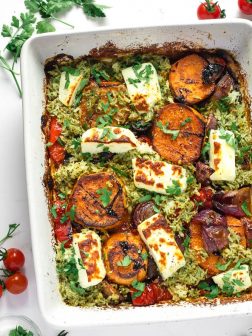
- Put the onions and peppers in a large bowl, then add 2 Tbsp of olive oil and most of the fajita seasoning. Toss to get everything coated nicely in the oil and seasonings. Scatter over the baking sheet. Then put the halloumi in the bowl with another 1 Tbsp of oil and the remaining seasoning, toss very gently to coat, and add it to the baking sheet too.
- (Alternatively you can just place the halloumi, onion and peppers directly onto the baking sheet, sprinkle the fajita seasoning and oil over the top, and use a spatula to get everything coated in the oil and seasonings – this may not give a perfectly even result, but it works fine and saves a bowl.)
- Place in the oven for 20-25 minutes, or until the halloumi is cooked to your liking. (You may need more or less time – every oven is different, so do check in often.)
Notes


The 2021 Update

This Halloumi Fajitas Recipe was originally published in 2018, then updated in 2021 with a few changes:
- Addition of a video and a wider selection of photos.
- New photos showing the fajitas cooked for the higher end of suggested cook time rather than the lower end, reflecting feedback from users who have made these fajitas.
- Updating the recipe method to suggest tossing the ingredients in a bowl before putting on the baking tray, to improve the reliability and replicability of the recipe.
LOVE this idea! Wish halloumi was more common around here. Would never have thought of using it in a Mexican dish!
LOVE this idea! Wish halloumi was more common around here. Would never have thought of using it in a Mexican dish!
LOVE this idea! Wish halloumi was more common around here. Would never have thought of using it in a Mexican dish!
What a great idea! Love sheet pan dinners and this one is spiced just right. Halloumi is one of my secret faves, too!
I just had halloumi for the first time at a Greek restaurant. They set it on fire and top with lemon juice. It was so good, that I’m now on a mission to eat it as much as possible! These vegetarian fajitas are top of my must-make list now!
This looks really delicious! What a great vegetarian fajita filling!
What a great idea! Love sheet pan dinners and this one is spiced just right. Halloumi is one of my secret faves, too!
What a great idea! Love sheet pan dinners and this one is spiced just right. Halloumi is one of my secret faves, too!
What a great idea! Love sheet pan dinners and this one is spiced just right. Halloumi is one of my secret faves, too!
I just had halloumi for the first time at a Greek restaurant. They set it on fire and top with lemon juice. It was so good, that I’m now on a mission to eat it as much as possible! These vegetarian fajitas are top of my must-make list now!
I just had halloumi for the first time at a Greek restaurant. They set it on fire and top with lemon juice. It was so good, that I’m now on a mission to eat it as much as possible! These vegetarian fajitas are top of my must-make list now!
I just had halloumi for the first time at a Greek restaurant. They set it on fire and top with lemon juice. It was so good, that I’m now on a mission to eat it as much as possible! These vegetarian fajitas are top of my must-make list now!
I’ve never heard of halloumi, but it sounds wonderful! I love fajitas, so I will have to try this receipe! Thanks for sharing!
LOVE this idea! Wish halloumi was more common around here. Would never have thought of using it in a Mexican dish!
Yum! These look amazing! I’m a big fan of the sheet pan method for fajitas, too. It’s really the only way I ever make them.
Yum! These look amazing! I’m a big fan of the sheet pan method for fajitas, too. It’s really the only way I ever make them.
Yum! These look amazing! I’m a big fan of the sheet pan method for fajitas, too. It’s really the only way I ever make them.
Yum! These look amazing! I’m a big fan of the sheet pan method for fajitas, too. It’s really the only way I ever make them.
Great recipe. I loved how crispy the halloumi and how quick and easy it was to make.
Thanks Rachel! So glad you liked it! 🙂
Great recipe. I loved how crispy the halloumi and how quick and easy it was to make.
Great recipe. I loved how crispy the halloumi and how quick and easy it was to make.
Great recipe. I loved how crispy the halloumi and how quick and easy it was to make.
Pingback: Healthy Halloumi Bake with Aubergine • The Cook Report
My friend Rachel told me about this fabulous recipe which has now become a firm favourite in our house. Being the only veggie I sometimes struggle to get my other half to eat what I am eating but he loves this, it’s so quick and easy to make.
My friend Rachel told me about this fabulous recipe which has now become a firm favourite in our house. Being the only veggie I sometimes struggle to get my other half to eat what I am eating but he loves this, it’s so quick and easy to make.
My friend Rachel told me about this fabulous recipe which has now become a firm favourite in our house. Being the only veggie I sometimes struggle to get my other half to eat what I am eating but he loves this, it’s so quick and easy to make.
Was really disappointed . Peppers were not cooked well and cheese started to melt so couldn’t even leave in longer than 20 min. Dish was a disaster. I would cook peppers and onion on their own and griddle the haloumi and then put it all together . Had friends for dinner and was so upset with how this dish turned out
Maxine, I am really sorry that this didn’t work out for you especially with guests over. How disappointing. Halloumi shouldn’t actually melt – it is not like normal cheese. So I am wondering if your halloumi wasn’t quite right or whether you mean that it started leaching liquid (which would also contribute to peppers undercooking). If it’s the latter, then it sounds like your oven temperature was lower than it needed to be. I test my recipes in a fan assisted oven – does yours have a fan?
Pingback: How to Cook Halloumi - Cook it Real Good
I cooked this dish this evening. I also added thickly sliced mushrooms. It was delicious! Thank you for posting such a fab recipe.
Oooh mushrooms would be a great addition! So happy you liked them!
We aren’t vegetarians so I added some sliced chicken as well. WOW the flavors are incredible! LOVE the halloumi! Thx
Made the halloumi fajitas last night….delicious! my o/h and I loved them…thank you Elaine : )
Pingback: Healthy Vegetarian Recipes You Can Make Under 30 Minutes - Fraser Valley Lifestyle Magazine
Absolutely delish. Thank you
Excellent recipe, quick easy and really delicious. Will definitely make it again
Put the halloumi and veg in to the oven together at the right temperature and after 20 mins, the veg was done nicely but the halloumi was completely burnt.
Better to do the halloumi in a griddle or pan when the veg is ready – only takes a couple of minutes.
I am so sorry for this experience. It sounds like either your oven is hotter than mine, or your halloumi had a different composition / less moisture content. I hope you were able to salvage your dinner.
Amazing our new favourite dish. Can you recommend any side dishes to go with it please?
That’s lovely to hear! Refried beans would be a great side, or a taco salad?
Oh my god these were awwwwesome!! Added one tsp chili-lime seasoning but no other changes. As a low-carb vegetarian, I’ve found myself in a rut recently and would never have thought to make fajitas with halloumi. Excited to have found your blog and can’t wait to try your other recipes!
Easy, delicious meal. Put the peppers, onion & halloumi in a bowl, drizzled the oil over & then added the spice mix, then tossed them all together before putting on the baking tray. Will definitely make this again.
Looks like a nice tasty recipe. However is there a temperature error?
You have 450F = 210C?
I thought 450F was 230C… or 232.2 to be exact. Quite a bit hotter.
And 210C is 410F
I’m guessing you meant to say 410F which in my village is 210C.
Thanks,
John Coyne
You’re totally right, and I’ve fixed that, thank you so much!
Delicious! Even my 12 and 14 year olds agreed. Will make again for sure. Thanks for the tasty recipe!
As a mainstream carnivore, I often find myself disappointed by vegetarian dishes. ( I am trying to reduce the amount of meat that I eat), this was excellent. I made it tonight. I will definitely be doing this again. I would imagine that it would work well with tofu for a vegan version.
OMG these were sooooo good! As a family, we are trying to eat less meat and we LOVE Mexican food so when I came across this recipe, I knew we had to try it! It’s seriously amazing – No one even missed the meat! We’ve made sheetpan fajitas before but I would never have thought of halloumi cheese as a vegetarian option (We also added portabella mushrooms). The saltiness + texture with the roasted bits from baking on the sheetpan make it such a great addition! This is definitely going into our regular meal rotation!
Pingback: The Best Halloumi Recipes To Try - The Instant Pot Table
Good evening!
Found this recipe and I had to try it!! I LOVE Halloumi cheese!!!!!!!!
My two super picky eaters absolutely adored this dish!!!!!! THANK YOU!!!!!!
Now… what can I do next to beat this one??! 😳
So happy to hear this! I have so many halloumi recipes – https://www.happyveggiekitchen.com/category/recipes/halloumi/
If you like using it in fusion cuisine like these fajitas, my halloumi pad thai or halloumi satay wraps might go down well! The halloumi bake with white beans is one of my most popular. You’ll find them all on that link 🙂
I’m renowned amongst my friends for my vege Mexican food… this recipe has actually taken my reputation to whole different level!! All of my friends eat meat, happily do vegetarian tho, some now request this for dinner, or go ” I hope we were having this”. . I KID U NOT! Make it, you’ll love it. Don’t cook the halloumi too much is the only thing I’d say. About 10 minutes, it keeps cooking. My first pictures review. Enjoy!!
This makes my day – thank you so much for sharing your feedback!
My family and I love this recipe! I have a third option. Place all the ingredients in a Ziploc bag and shake gently to coat evenly. Then put on the sheet pan. This reduces the need for the extra bowl. 😆
Great idea! 🙂
I wouldn’t use a ziplock bag, it makes unnecessary plastic waste! You can easily wash a bowl.
The recipe is really nice! I love a quick and tasty dinner 🙂
Good point – thank you for raising it! I am so glad you enjoyed the recipe 🙂
Last night I made fajitas for the second time (maybe third?) and came by to say thank you for this ridiculously easy and delicious tray bake! My husband and I both love how it’s seasoned and cheesy, all the components of a very yummy meal! This recipe is in our weeknight rotation. Thanks again!
So happy to hear this! 🙂
Love this recipe, halloumi’s just so great!
I make this at least once a month! It’s delicious and so easy to make on the sheet pan. It’s the perfect weeknight dinner! I can’t always find halloumi where I live, but I have found that other grilling cheeses, like paneer and panela, work just as well!